
Maximize Your Content: How We Turn 1 Video Into 28 Pieces of Content
There’s a lot to be said about placing quality over quantity when it comes to content creation for businesses, however today we’re here to make the argument:
You do not have to sacrifice value for quantity.
Today we’re going to do two things:
1. Assume that the content you’re creating is already providing value; that is, giving something to your end consumer that they want and/or need.
2. Show you how to maximize your existing content to go farther and last longer.
Specifically, we’re going to show you how we took 1 interview (video with audio) and stretched it to create 28 pieces of valuable content.
How To Turn 1 Video Into 28 Pieces of Content
Step 1: Polish Your Initial Video, aka “The Mother Content”
This specific example will work best if you have a piece of long-form video content that also includes high-quality audio. In our case, it was a 30-minute sit-down interview with commercial photographer Lauren Jones.
Other types of content that can take the place of an interview:
1. Day-in-the-life compilation of you conducting business, having meetings, and - most importantly - talking about your business in a candid way. Great for: Bloggers, Solo Business Owners, Agencies, Public Speakers
2. Time-lapse screen capture of you working, talking viewers through what your process. Great for: Graphic Designers, Artisans, Consultants
This “Mother Content” is what all other 19 pieces of content will come from. So naturally, the first thing we did was edit this down from raw footage to a final edit (we did things like cut awkward silences, removed annoying figures of speech, and chose a clear start and finish). We also added any b-roll (like showing examples of Lauren’s work) along with an intro slide + audio.
Export this footage to .mp4 format and you’re left with a polished, finished video in its fullest form.
Upload this video in full to Youtube. < Content piece #1

Pro tip: We edit all of our video content in Premiere Pro. If you’re an Adobe Cloud subscriber, this program is available for free as part of your subscription.
Step 2: Reformat for Mobile (Instagram Stories and Feed Posts)
We’re living in a mobile world where vertical orientation is king. Youtube (or a similar platform like Vimeo) is the only place in which “The Mother Content” will live with its original aspect ratio - apart from where you choose to share on Facebook (and even then, you can choose vertical over landscape).
Pro tip: You can choose to record your raw footage in vertical format to begin with, however won’t be able to maximize its reach by uploading to landscape-favoring platforms like Youtube and Facebook.
The next step is to reformat your aspect ratio in to fit Instagram Stories (as well as Pinterest). When you’re in Premiere Pro, simply click on Sequence at the top navigation bar > select Sequence Settings.. > and change your Frame Size to 1080 Horizontal, 1920 Vertical. When importing your video file into the new timeline, it will ask whether or not you want to keep the existing sequence settings. Click yes, and your video will reformat to the frame.
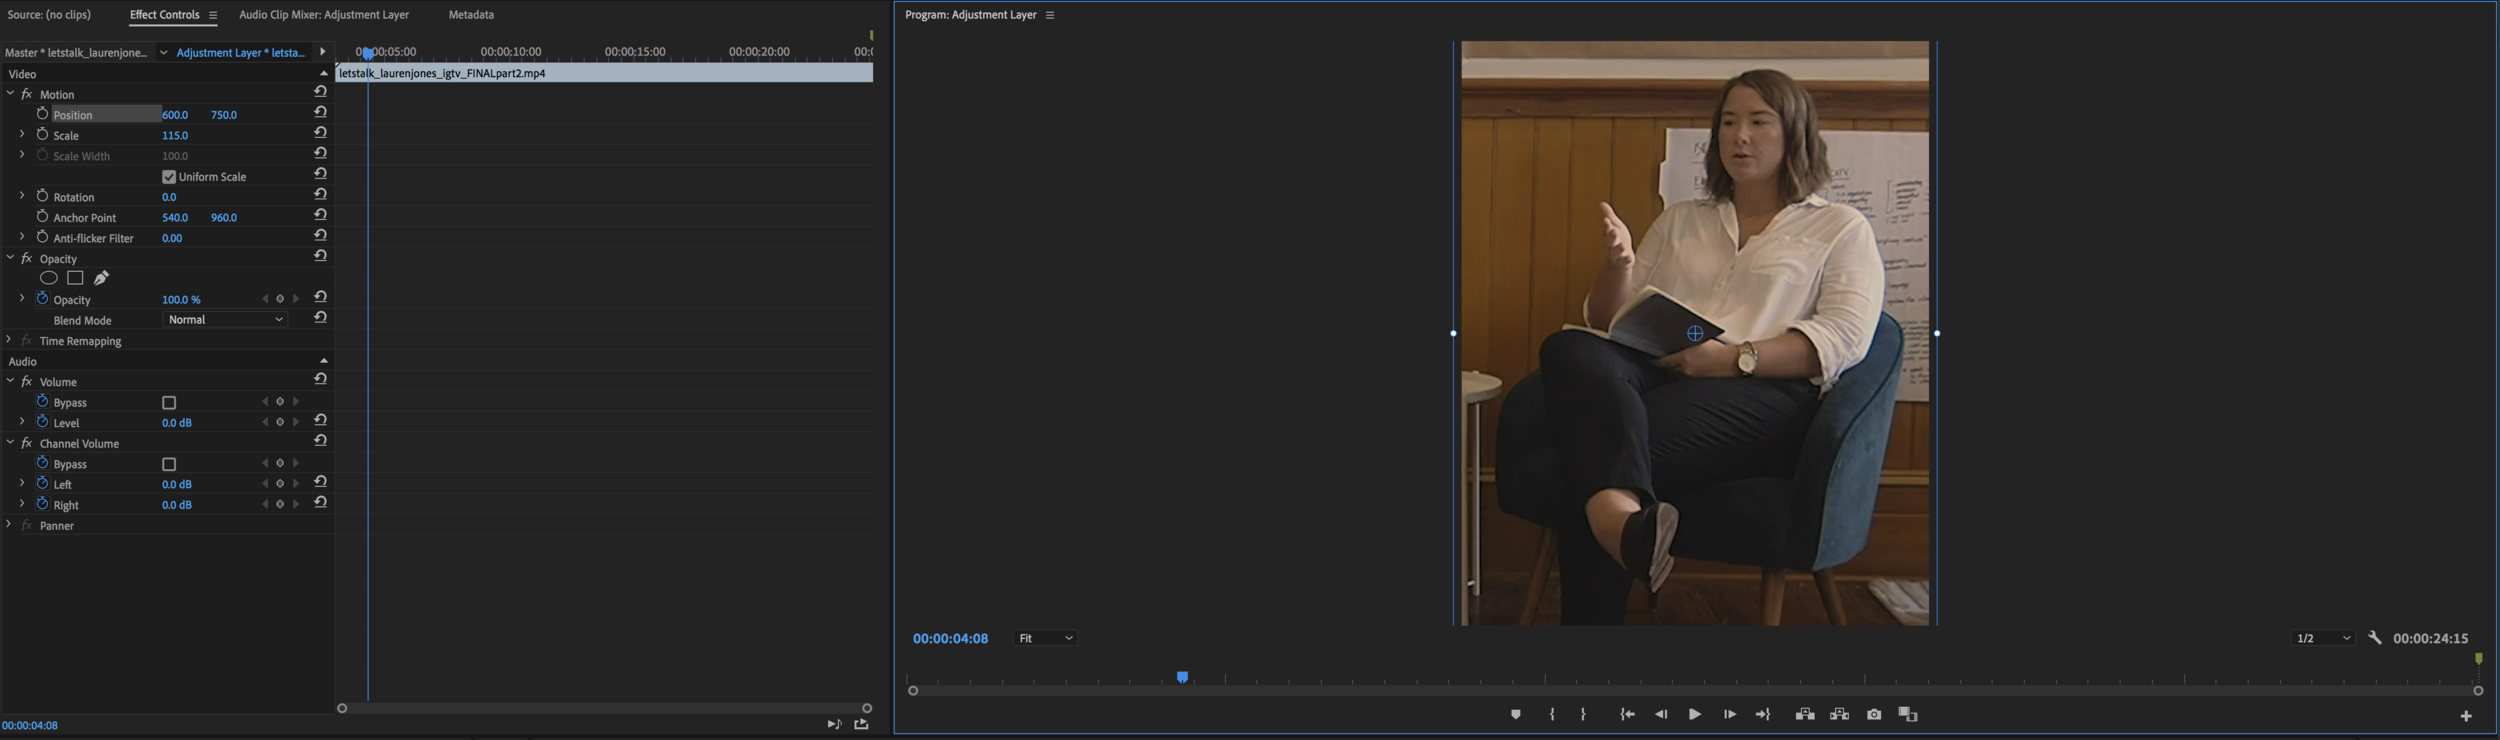
Note that the above example is set to a 4:5 aspect ratio as we were editing for Instagram Feed Posts at the time.
Once your frame is set to vertical, you’ll need to cut your video up into pieces so that the speaker (or whatever your desired point of focus) is always in the center of the frame. You do this by selecting the clip > click Position in Adjustment Layer Effect Controls > click and drag your video preview until you have your content back in frame.
Pro tip: Knowing your wide video will eventually be cropped to vertical, make sure there’s enough room in frame when recording.
Continue to cut frames and reposition until your video is fully reformatted for vertical. Bonus points for using a video subtitle software to attach closed captions!
Upload this video on IGTV and/or your Instagram Story. < Content piece #2
Pro tip: IGTV will only allow up to 10 minutes of video, so you may need to divide this video into several parts before uploading. Instagram will automatically chop your long-form video into :15 clips up to 10 clips. If your video will result in more than 10 :15 clips, use an app like CutStory to chop it up for you, then upload 10 clips at a time.
Ready to hire a professional, yet? ;)
Step 3: Identify Key Soundbites to Create Mini Videos
Within our entire 30-minute interview with Lauren Jones, there were 5 specific soundbites that either clearly answered a question or provided a ton of value to our audience. Once we identified those soundbites, we created title cards to place at the intro of each mini video (and to use in other ways, which we’ll show you).

Attach video soundbites, export as .mp4, and schedule on Instagram. < Content pieces #3-8
Step 4: Turn Key Quotes into Graphic Posts
While you’re in the headspace of creating title cards, create an additional graphic template to visually share key quotes taken from the video. In our case, we chose 3 quotes that stood out the most (and that fit nicely on a 4:5 template).

We’ll post these on Facebook, Pinterest, and Instagram with either a long-form caption to spur discussion, or a hyperlink. < Content pieces #9-12
Step 5: Transcribe the Audio into Written Form
Full disclosure: we hired a contractor through Fiverr to transcribe our :30 minutes of audio into written form. If you have the free time and want to save some money, by all means go for it. However, for us it was much faster to fix any errors a transcription carried than to play, stop, type, play, stop…
Once you have a full transcription, you first publish a “full interview” type blog post (something that has all of the content in one place), followed by secondary “soundbite” blog posts.
For us, that was the following:
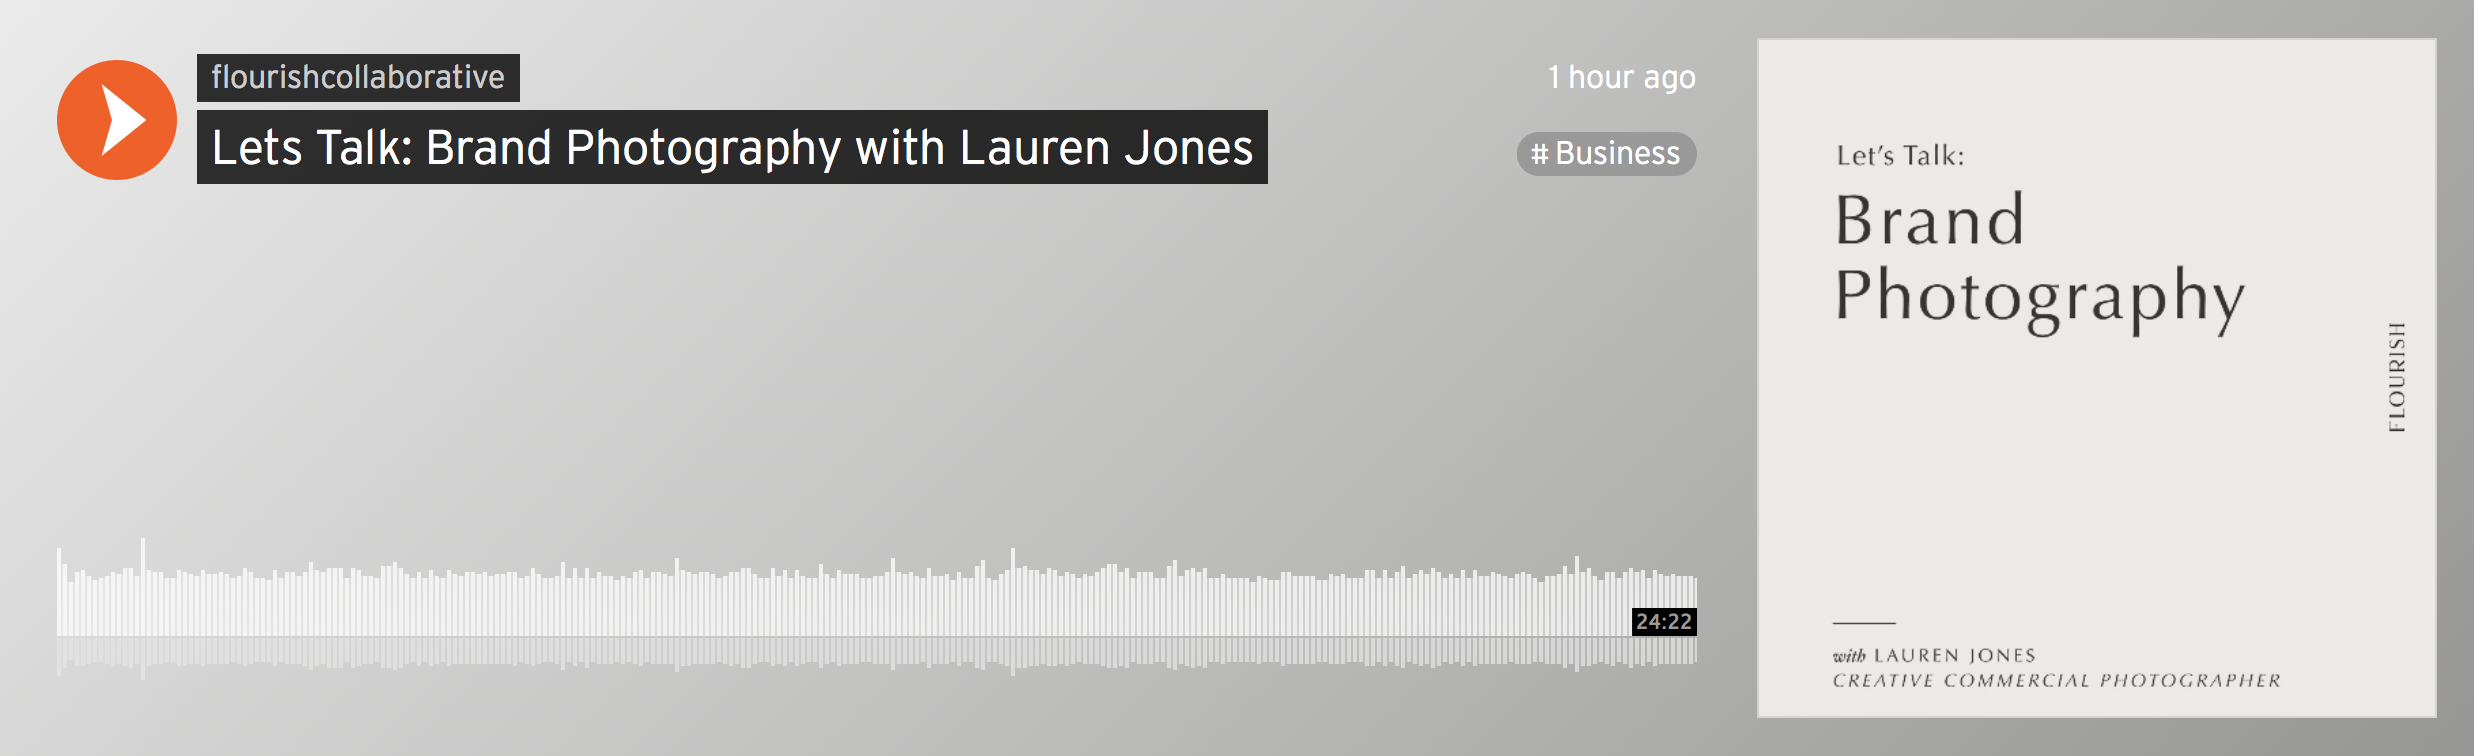
Let’s Talk: Brand Photography with Lauren Jones, Commercial Photographer
Wait! Before You Hire a Brand Photographer: Things to Consider
These 4 Questions Will Lead to Better Photos
We could have stretched this even further (and still might in future) with articles like:
Photo Licensing vs. Full Buyout: How to Purchase Commercial Photos for Your Business
10 Ways to Market Your Product-Based Business with Brand Photography
10 Ways to Communicate Your Service with Brand Photography
…the list could go on. Add relevant photos for a visual break and publish to your website, Linkedin (no, it’s not dead), or pitch it to a larger publication for greater exposure. < Content pieces 13-15.
Pro tip: Remember, you have the video and audio versions of this interview, so be sure to include links to where those live in case people want to watch or listen vs. read.
Step 6: Leverage the Audio
Maybe you’re not ready to dive head first into podcasting, but there’s still value in having this content live in audio form for the time being.
We uploaded the interview in full on a Soundcloud account, as well as embedded the audio into each blog post in case readers wanted to listen while they worked. < Content piece #16
Don’t stop here: you can further chop this audio into soundbites just as you did the full video. In fact, while in Premiere Pro, delete the video portion of those soundbites and export the audio separately before starting on the next clip. We’ll get 11 soundbites out of this audio:
Let’s Talk: Brand Photography with Lauren Jones (full interview)
When Does Photo Licensing Actually Make Sense?
Taking Brand Photos: Where to Begin
The Biggest Myth Surrounding Content Creation
Is Your Brand Relevant on the New Visual Google?
Is Brand Photography Really Worth the Money?
How to Humanize Your Brand (and why that matters)
The Process: What to Expect When Hiring a Brand Photographer
How We Save a Ton of Time with Bulk Creation
Effective Content Marketing Comes Down to This Single Concept
2 Things to Know Before Hiring a Brand Photographer
< Content pieces 17-28
Pro tip: design titles cards for all of the above audio bites for 11 more pieces of content that can be used on your Instagram feed.
It’s easy to read through this and think, “Wow, that is a ton of work.” But if your business is already taking the time to produce audio and video content, why wouldn’t you maximize your existing efforts to their fullest potential? A few things to keep in mind as we close:
1. Share your content more than once, in more than one place.
2. Realize how much content you create a human or business that you’re not capturing - and do that.
3. Understand that more than one type of consumer can be interested in the same content, as long as it’s packaged in a way that speaks directly to them (vs. everyone).
Did you find this article helpful? Let us know by sharing and leaving a comment!